Stop Paying for Email Hosting
Every developer has faced this exact financial trap. You buy a beautiful new domain for your side project, startup, or client. You need a simple, professional email address like contact@yourdomain.com to send transactional mail, handle contact forms, or build brand authority.
But when you click to set up the inbox, you are greeted with a paywall: $6, $12, or even $18 per user, every single month, just to hold a handful of text messages. The alternative is worse: SSHing into your self-hosted server, manually running arcane terminal scripts, editing config files, or executing manual database operations on your remote mail data plane just to reset a forgotten password.
We refused to accept this trade-off. Your self-hosted server has plenty of power, and your domain belongs to you. Managing it should not require a subscription tax or manual command-line torture.
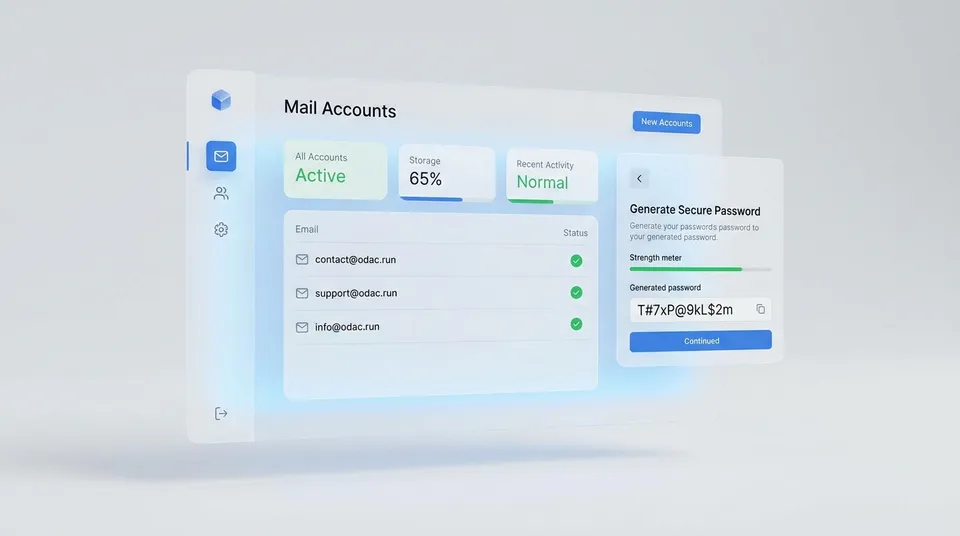
With the release of ODAC v2, we are introducing native, visual email mailbox management directly from the Live Canvas at app.odac.run. You can now fully create, list, secure, and delete custom email accounts on your self-hosted servers in seconds.
The Visual Evolution: From SSH Pain to Cloud Canvas simplicity
Before today, provisioning a custom mailbox on a self-hosted server was a tedious, manual task. You had to log directly into your server via SSH, run direct shell scripts, or perform direct database operations.
With ODAC, this workflow is completely visual. When you make a change on the dashboard, ODAC instantly orchestrates your server, creating secure mailboxes and displaying updates on your screen in real time.
If your server goes offline, ODAC keeps you safe. The dashboard reads a secure, local mirror of your configuration, keeping your existing accounts fully visible in read-only mode, and showing a helpful offline warning rather than timing out.
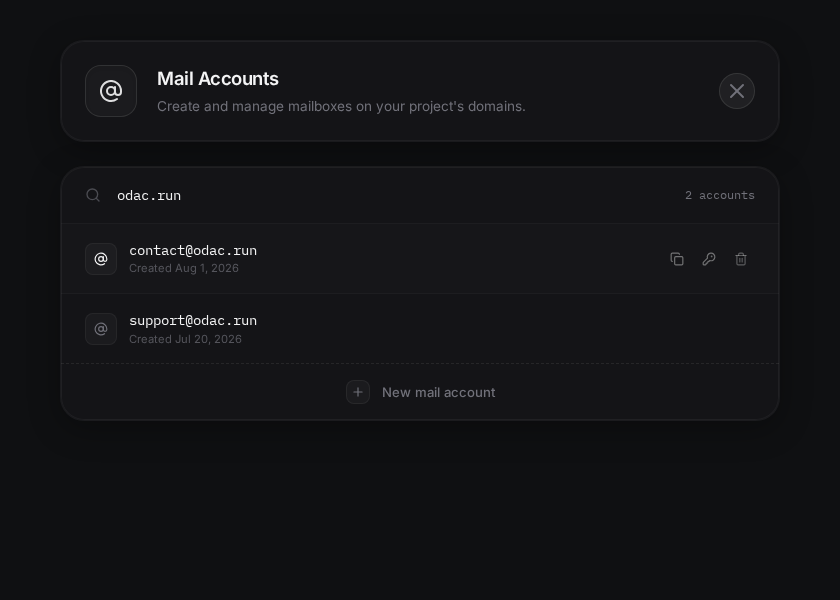
Step-by-Step: Provisioning Your First Mailbox on ODAC
The setup process is entirely frictionless. You can go from zero to a fully active, secure custom mailbox in less than a minute.
1. Select Your Server and Navigate to Mail
Log into the Cloud Dashboard at app.odac.run and select your self-hosted server from the Live Canvas. From the sidebar, click on the Mail icon. ODAC automatically loads the domains connected to your project.
2. Choose Your Domain
The accounts card features an integrated domain selector search bar. Start typing your domain name, or select it directly from the suggestions overlay. ODAC loads the active mailboxes on that domain instantly.
3. Add a New Mailbox
Click New mail account at the bottom of the card to slide open the creation form.
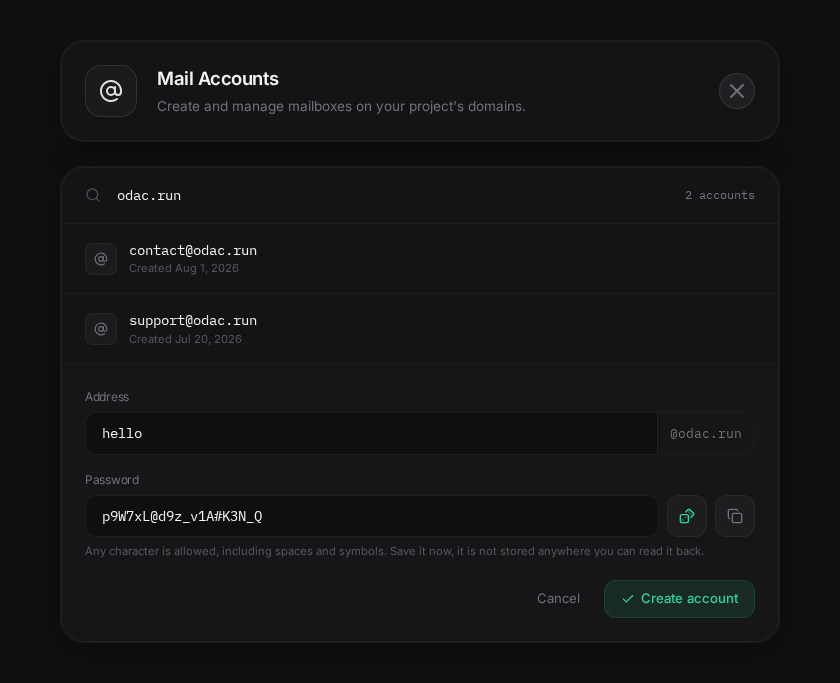
4. Secure and Create
Enter your local username (like hello or support). To make securing your mailbox painless, click the Generate button (the dice icon) to create a cryptographically secure, random password, which is automatically copied to your clipboard.
Click Create account. The form folds back, and your new mailbox appears on the list instantly, fully provisioned on your server and ready to receive mail.
Seamless Security: Smart Defaults and Zero Friction
We built this feature around the core principle of Radical Simplicity. While the underlying system validates security constraints by enforcing a dual-password validation process, the Cloud Dashboard handles this completely. When you submit through the UI, it takes care of validation requirements transparently, meaning you never have to retype your password twice.
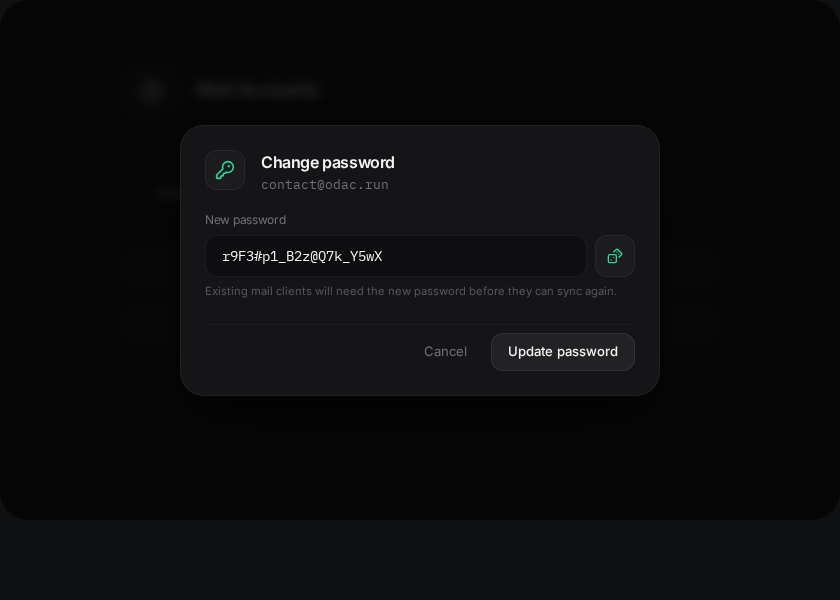
If you ever need to rotate passwords, clicking the key icon on any mailbox row opens a premium glassmorphism modal where you can instantly generate and apply a new secure password.
Developer-First: Matching CLI Orchestration
While the Cloud Dashboard is the easiest way to manage your infrastructure, ODAC is built for developers. For operators who want to administer accounts directly from the command line, we have upgraded the local odac CLI with matching email commands.
While the dashboard consumes structured data objects to populate your Live Canvas with rich metadata, dates, and badges, the CLI outputs clean, newline-separated plaintext strings optimized for terminal scripting and automation.
Create a Secure Mailbox
odac mail create contact@my-domain.com "StrongPassword123!"
List Active Mailboxes for a Domain
odac mail list my-domain.com
Update a Mailbox Password
odac mail password contact@my-domain.com "NewStrongPassword456!"
Delete an Obsolete Mailbox
odac mail delete contact@my-domain.com
With ODAC v2, you have total control over your communications. Stop paying the workspace tax, avoid manual server configuration, and host your email on your own terms. Head over to app.odac.run and provision your first mailbox today.