Stop Leaking Container Ports: ODAC's Redesigned Secure Routing Architecture
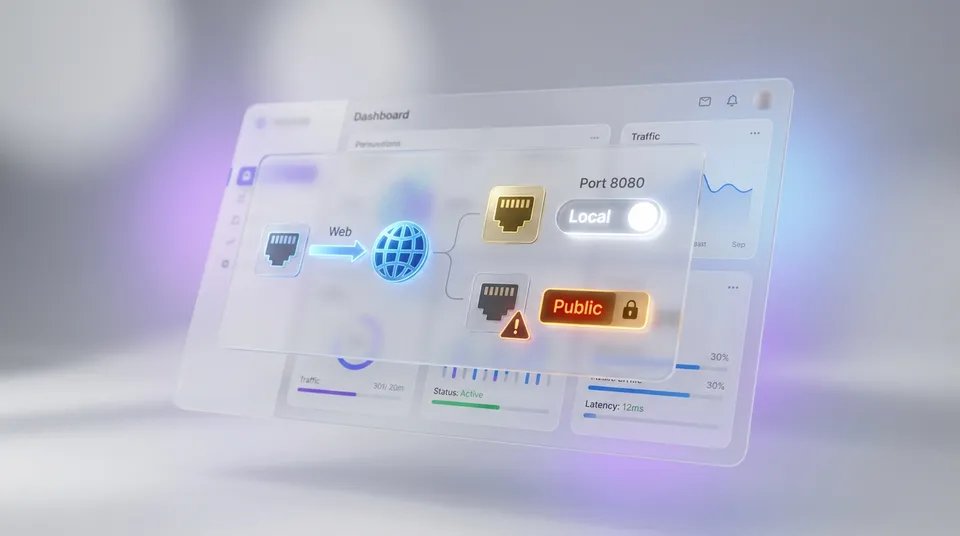
In modern cloud deployments, one of the most terrifying security failures is the accidental public exposure of a sensitive backend tool.
Whether it is a Redis cache, an internal monitoring database, or an administrative dashboard, a single mistyped port definition can bind your container directly to the public web interface, inviting automated bots and malicious actors inside.
Traditionally, container engines and cloud orchestrators bind published ports to the open internet (0.0.0.0) by default, requiring complex networking rules or manual firewall configuration to achieve basic isolation.
We decided that "good enough" was no longer an option.
We are completely rebuilding the way network ports are managed, mapped, and secured in ODAC.
This update introduces a "Secure by Default" network architecture, granular internal web routing via proxy sentinels, and an evidence-based HTTP auto-discovery mechanism that eliminates container port guessing forever.
The Villain: Default Public Bindings and EXPOSE Metadata
When you self-host applications using traditional setups, you run into two major issues.
First, publishing a host port (like mapping container port 5432 to host port 5432) often opens that port to the entire internet. This occurs because container tools punch directly through host firewalls to expose services publicly.
Second, most self-hosted platforms guess your web application's listening port. They rely on fragile EXPOSE metadata in container images or fall back to port 3000, which frequently fails if your app runs on a custom port or ignores environment overrides.
The result is a fragile deployment pipeline where services either fail to route or, worse, expose their raw internal interfaces to the public web.
Secure by Default: The Local vs. Public Isolation Matrix
ODAC solves this exposure risk by isolating host-published ports automatically.
Starting today, any container port you publish to the host is bound strictly to 127.0.0.1 (local loopback) by default. This guarantees that internal resources (such as monitoring endpoints, databases, or message queues) are reachable only from the host server itself.
If you genuinely need a host port to be accessible from the internet, you must explicitly opt into public binding.
Here is what this configuration looks like in your standard application settings block:
"ports": [
  { "host": "proxy", "container": 3000 },
  { "host": 8080, "container": 8080, "public": true }
]
By separating host-level bindings into local and public classes, you gain absolute peace of mind.
Your backend databases remain completely unreachable from the outside, while your public API gateways are exposed with a single conscious toggle.
Evidence-Based Port Auto-Discovery
To make web deployment entirely hands-free, we have retired heuristic port guessing.
Instead of reading stale container image metadata, ODAC now employs an active, HTTP-based auto-discovery probe.
When your application starts, the platform actively sends lightweight HTTP requests to listening ports. Once a service successfully responds, ODAC confirms the exact port where your web app is alive and configures the routing rules instantly.
If your application ignores the standard PORT environment variable or lacks metadata, our auto-discovery engine finds the correct port in milliseconds, preventing routing errors before they happen.
How to Configure Secure Ports on the Live Canvas
Managing your network topology is incredibly simple on the ODAC web dashboard.
You can do this with just a few clicks at app.odac.run, or if you prefer the terminal, you can define your configuration when creating an app:
odac app create
Let us walk through the simple steps to configure your ports using the visual interface.
Step 1: Open Port Configuration on the Canvas
Navigate to your Live Canvas at app.odac.run and select your active application to open the inspector drawer.
Click on the settings icon to open the configuration panel, where you will see the redesigned Ports section.
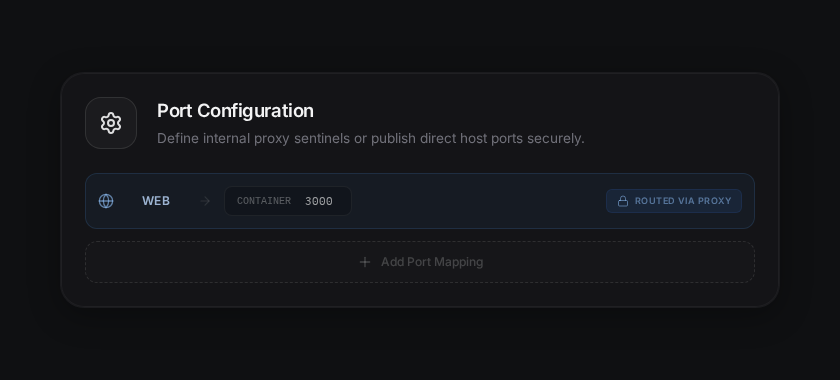
The blue Web row is your internal proxy sentinel.
Because it uses the proxy sentinel, traffic routes securely through ODAC's internal reverse proxy without binding any host-level ports, offering a direct pathway from your custom domain to your container.
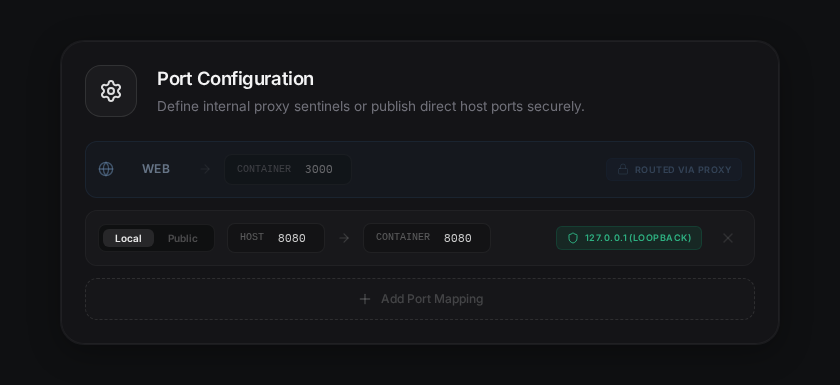
Step 2: Add a Secure Local Port
To expose a non-HTTP service (such as a metrics endpoint or a database), click Add Port.
By default, the new port is marked as Local. This ensures it is bound to 127.0.0.1 and is completely invisible to the outside world.
Step 3: Explicitly Enable Public Traffic
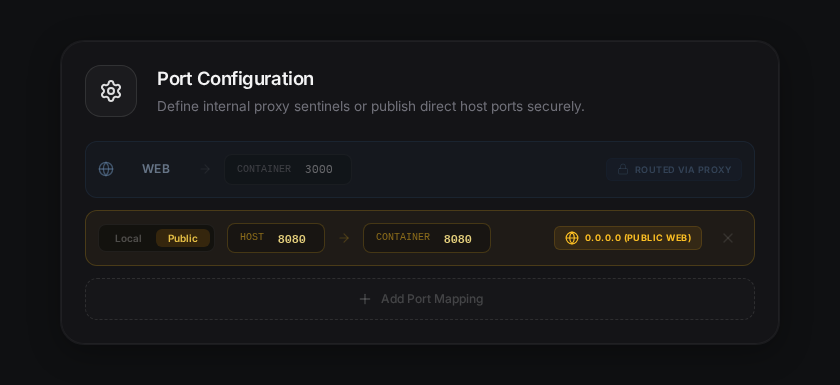
If you need a specific host port to be reachable directly via TCP from the public internet, select the Public option on the segmented switch.
ODAC immediately tints the row amber, providing a clear visual warning that this port is published to 0.0.0.0 and open to external traffic.
Crucial Networking Guardrails
While this new system offers maximum flexibility, there is one key architectural rule to remember.
Ports designated with the proxy sentinel cannot be toggled to Public.
Since proxy ports are routed entirely within the internal network of the platform, they do not have a physical host-level port binding. If you need both, you can simply map the container port twice: once as proxy for clean domain-based web access, and once as a published numeric port for direct TCP access.
This granular network control is live today for all tiers.
Head over to app.odac.run to secure your endpoints and experience zero-config hosting done right.